
 NEW!! Free UK Delivery
 Hassle-Free Returns
 Great Advice
 Clearpay


Contour lines are the most important references you can get on a map. Contours show us the layout of the land, how steep or flat a section can be and also it can tell us how high or low we are against sea level.
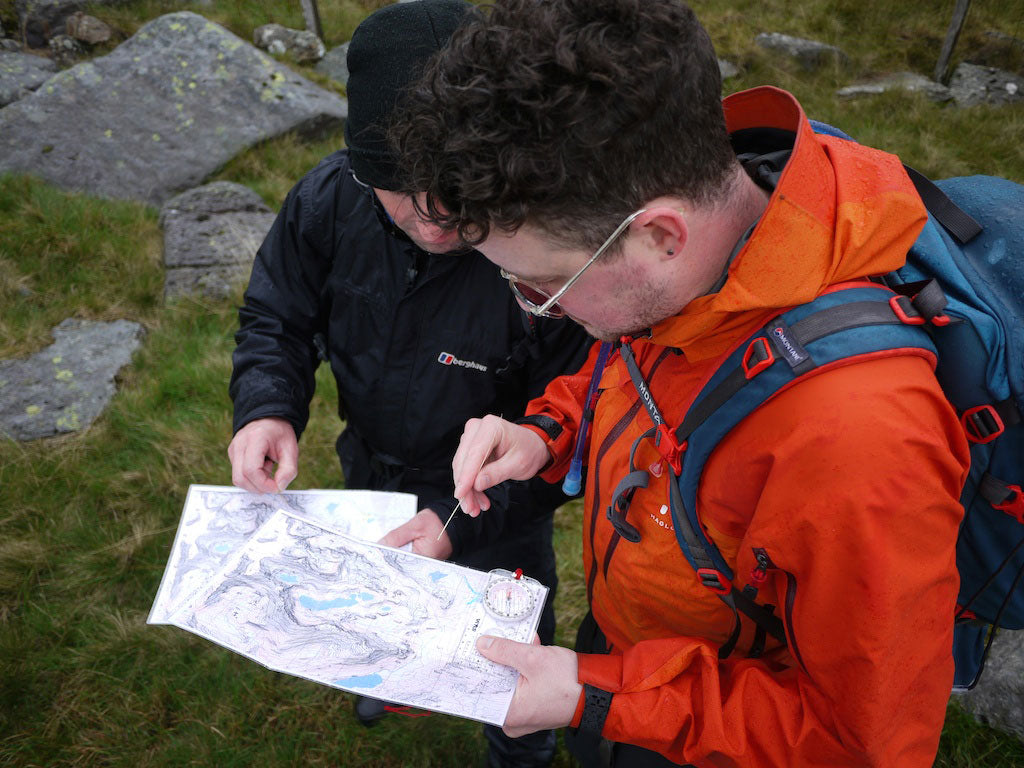
When you are out hiking you might have seen fellow hikers with maps that only have contour lines. This is considered “Advanced Navigation”, they use the contours to work out where they are on the map. There are no references to rivers, car parks, picnic areas and even pubs! They use the contour lines and sometimes a compass to pin point where they are in their surroundings and work out which trail they want to take.
Now before you run off and print off a contour only map and give this a go you really need to understand how maps work. Now you might be thinking well I’ve been reading maps for years now how hard can it be? Well the biggest mistake people make is when they overlook the map and convince themselves that they are going in the right direction when in reality they're not (we have all been there and done it!), and that’s a common mistake that people make with normal OS maps. Just think of the confusion you could get yourself in with a contour only map.
So the first thing we would say to do is join a course on Advanced Mountain Navigation. Our very own blogger Rob Johnson teaches this course in and around the Snowdonia area. What you could also do is research how a Topographic map works, as this will help you pick up navigating like this a lot quicker.

Let’s take it back to basics shall we, how do contours work? Contour lines are drawn on a map connecting points of equal elevation, this means if you are following a contour line your elevation would stay the same. If you start to go down or uphill and there is no indication of this on your map then you have strayed from the contour line you were following. A contour line is also used to show you the shape of the land you are hiking on. Using the index contour (the thicker line) it shows you the difference in height, between the index contours you have the contour interval and the contour lines.

The contour interval tells us whether the ground is flat or not, so the further the contour lines are away from each other the flatter the ground will be and vice versa if the contour lines are right next to each other this tells us that the contour interval is steep. The contour line shows us how steep or flat an area can be, looking at the contour lines will show us whether there is a route or trail to take and this is of course determines how close or far apart the contour lines are.
Be warned though, don’t just look at the contour intervals and judge how steep an area is, you will need to look at the contour line because this also tells us the shape of the area.

So you have now mastered looking at the contours on the map but that is only half the job done. Using the contour only map you now need to look at the area ahead of you and try to line the map up. You will really need to look at the details on the contour line and then match it up with what is in front of you, this does take some skill so don’t worry if you can’t get it straight away, plus looking from a bunch of zig zagging lines to looking at the landscape can be every confusing.
Just remember to take your time when it comes to advanced navigating, if you’re not sure the route you have picked or are taking a stop, reset the map, look at the contours and what is in front of you.